
My brother and I spent a lot of time creating the Theremax, but we only produced one. We decided that I would keep the final product, and I decided that it would be a bit unfair. Thus, I decided to surprise him with his very own Theremax by trying out self-etching of my own PCB.
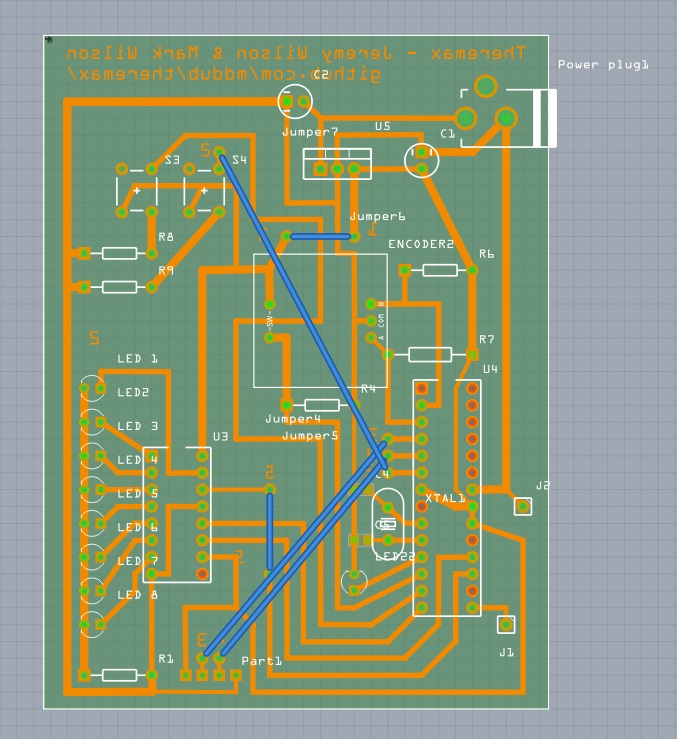
I started out by designing the PCB based on the wiring from the pre-perf PCB schematic I used to create the first Theremax. Since it is a single-sided PCB, I had to use some jumper wires to make it work.
I then printed the schematic onto photo paper and used a clothes iron to transfer the toner onto the copper board.
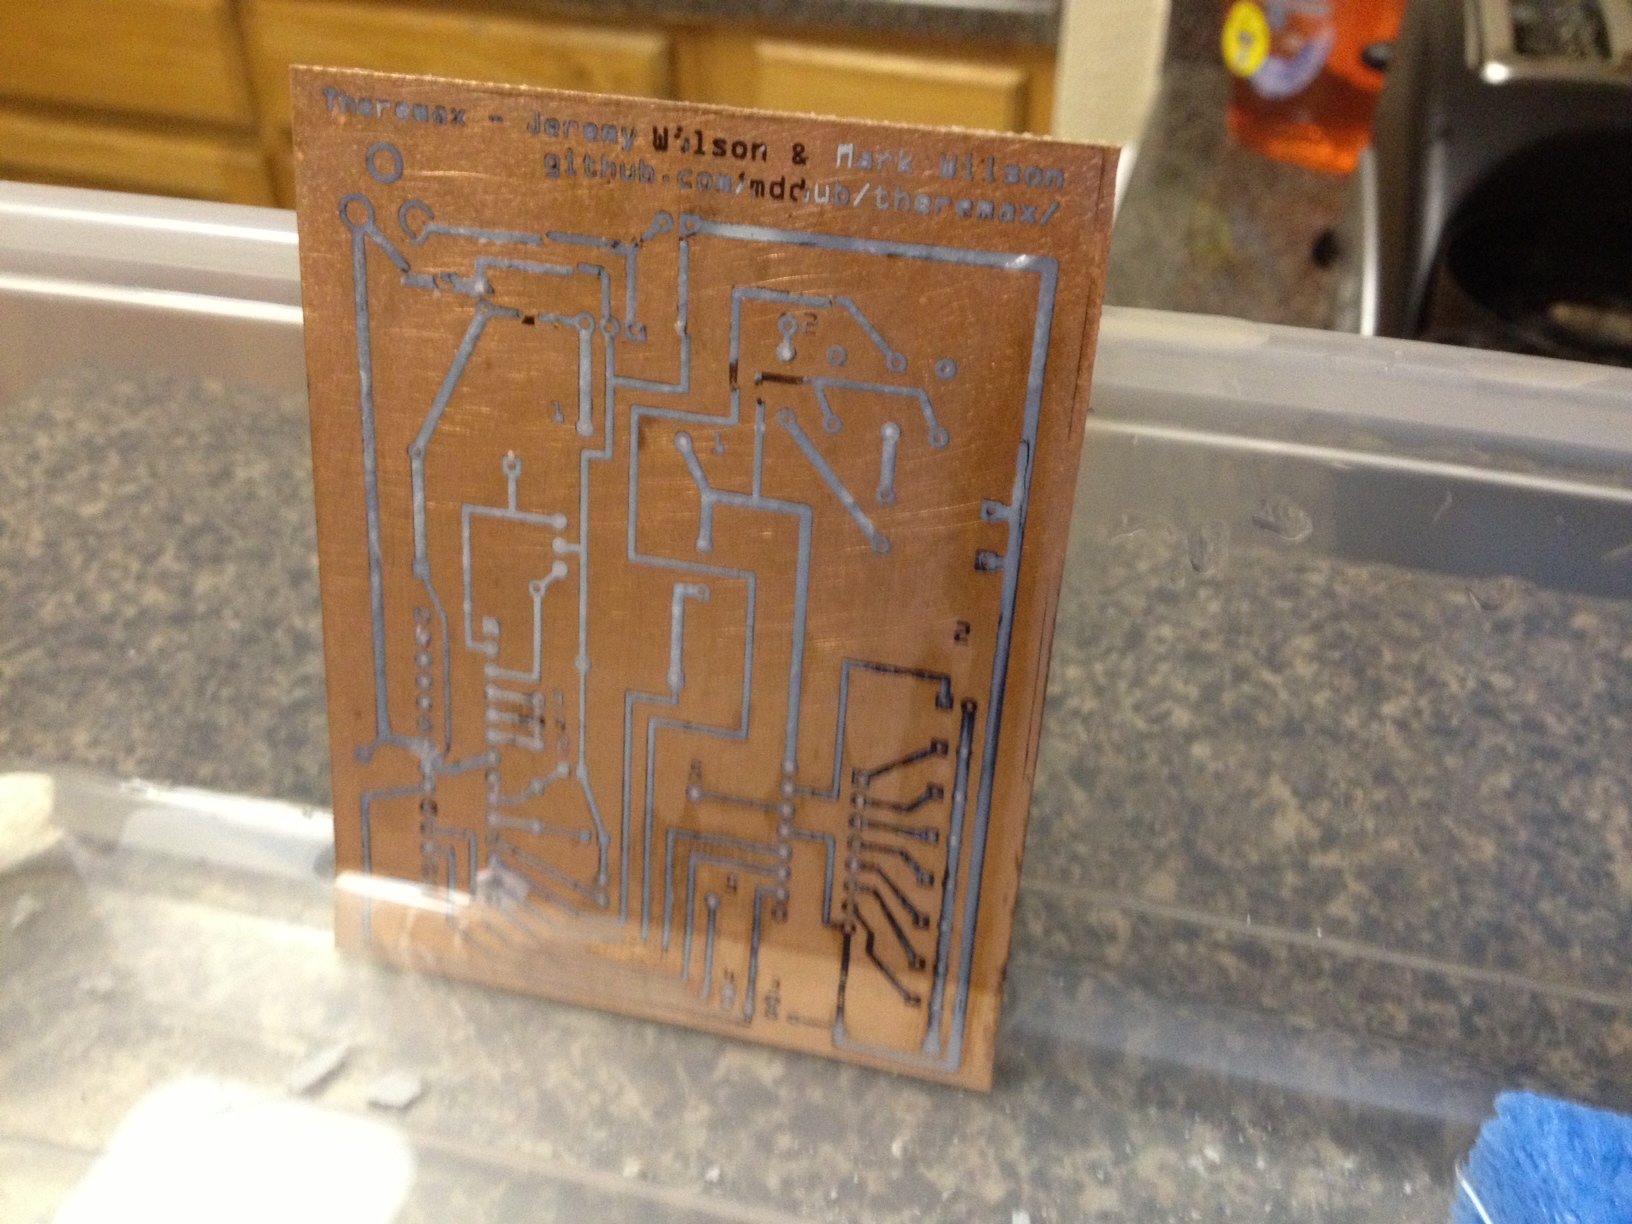
I then etched the board with ferric chloride for about an hour.
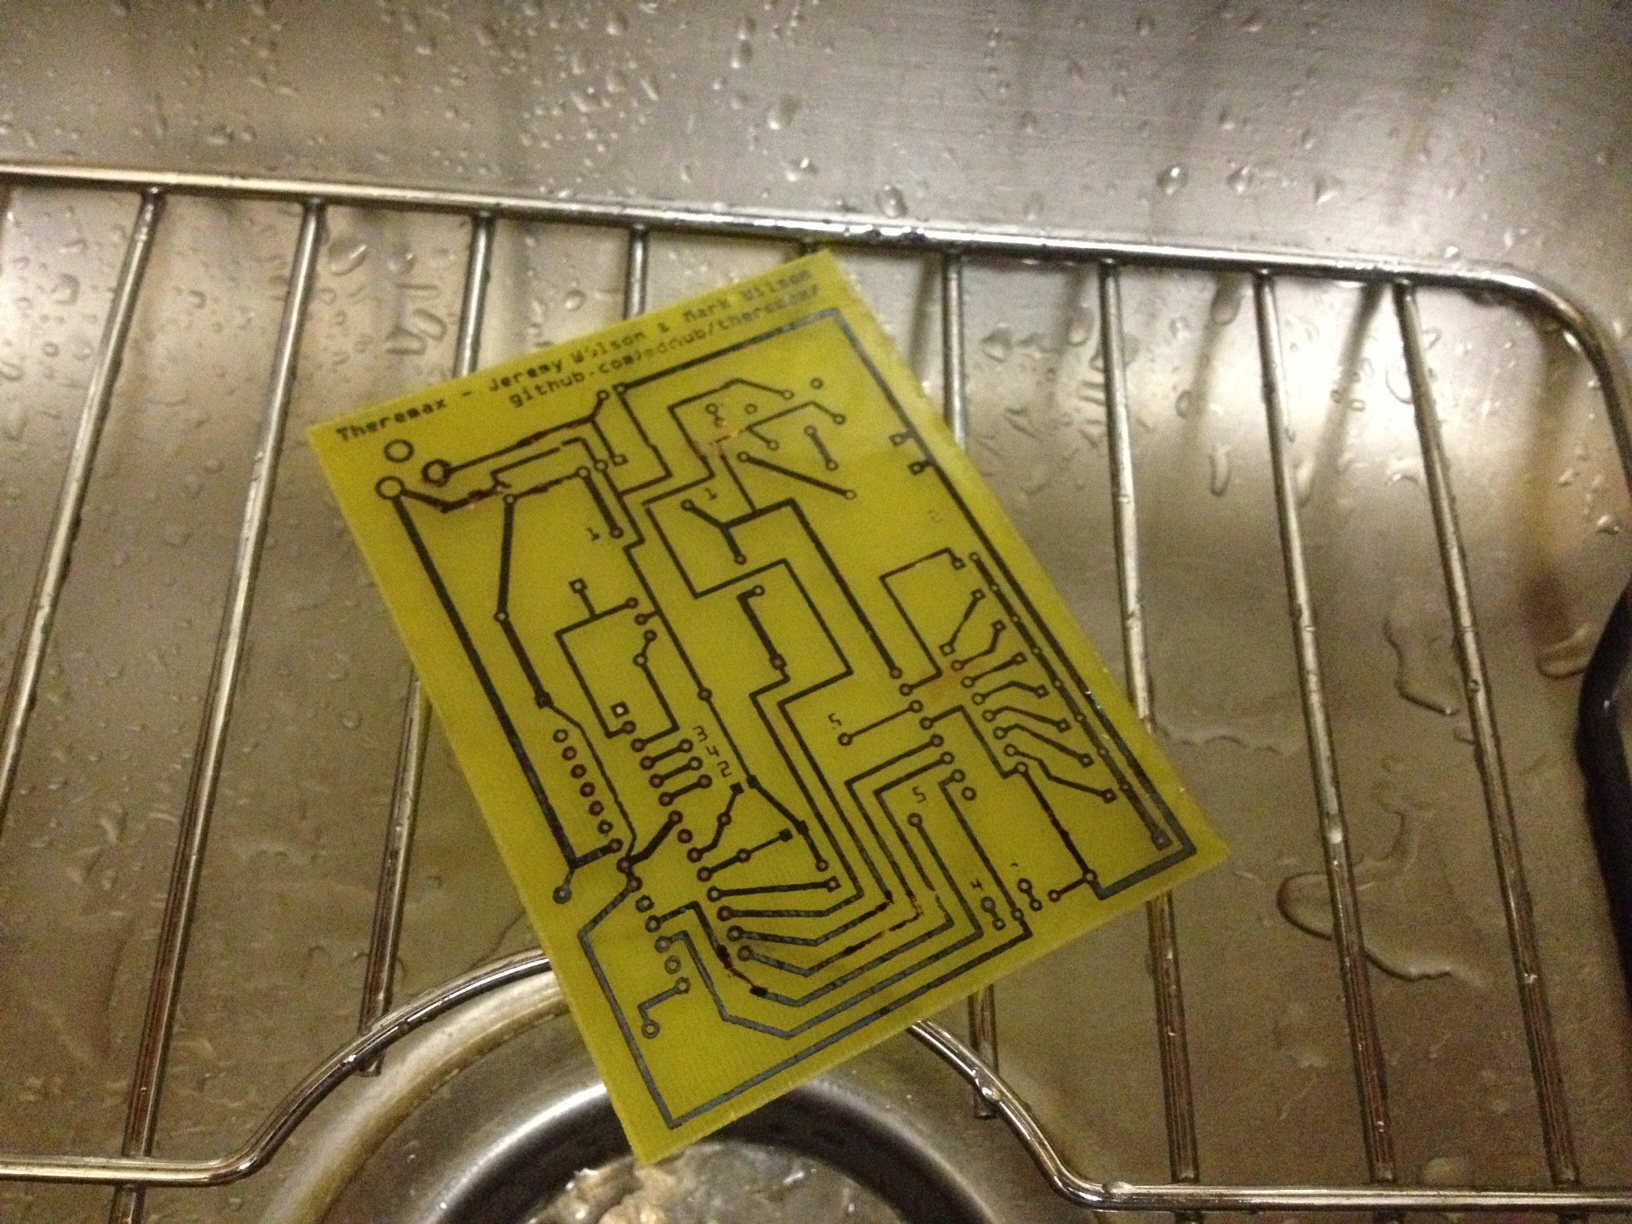
I then removed the toner with the rough side of a sponge. A successful etch!
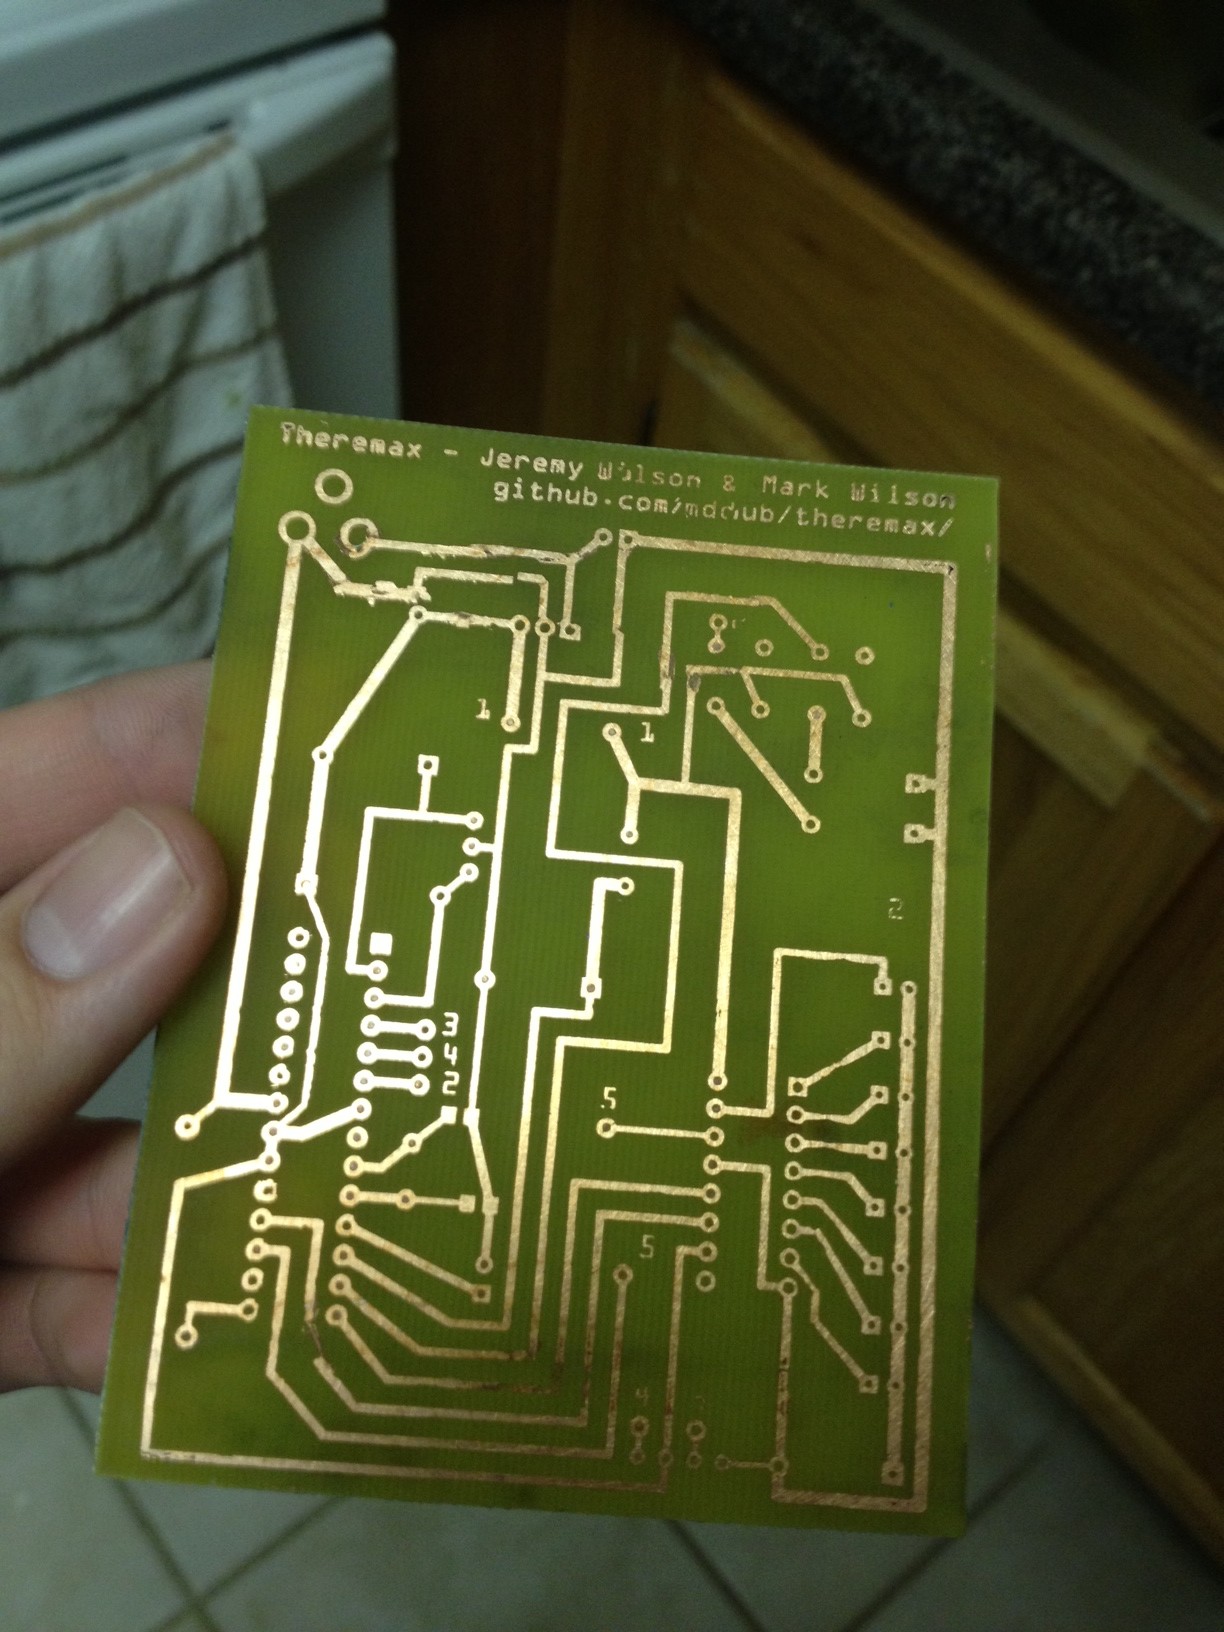
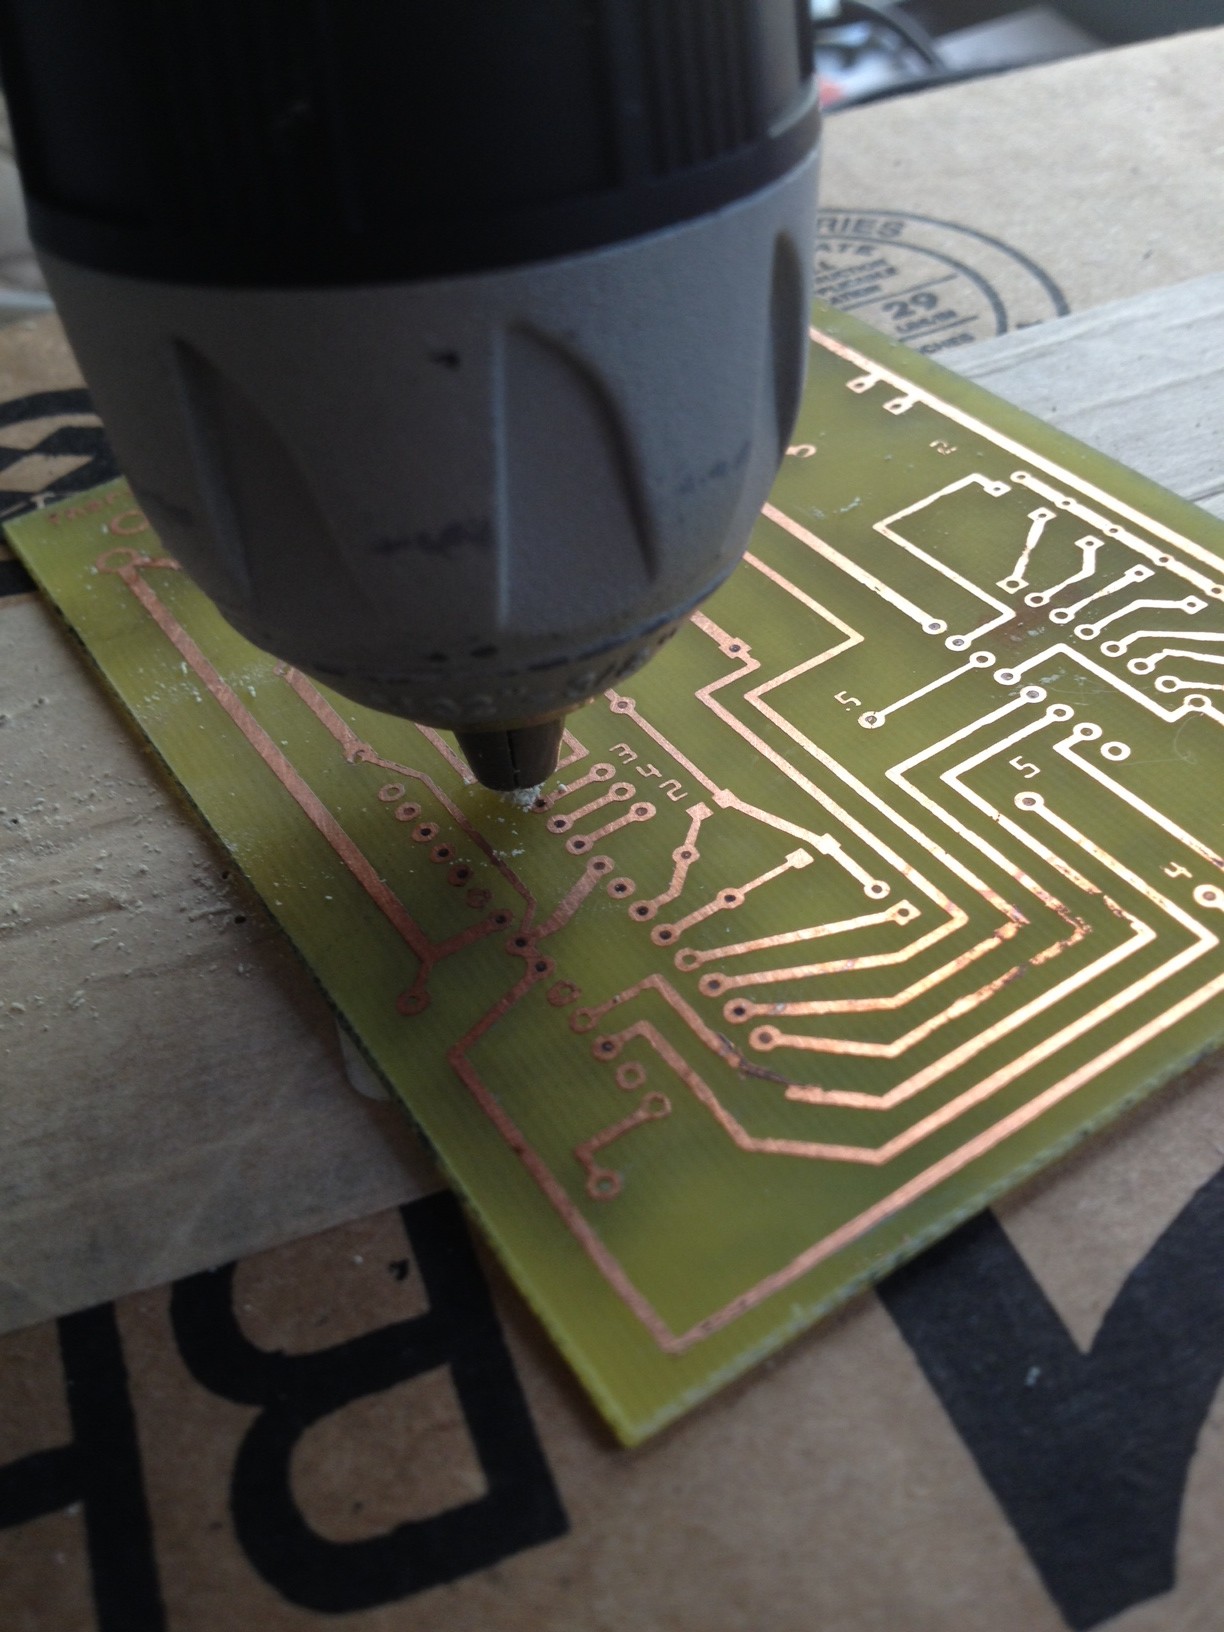
I then used a 1/32″ drill bit to drill all the holes required.
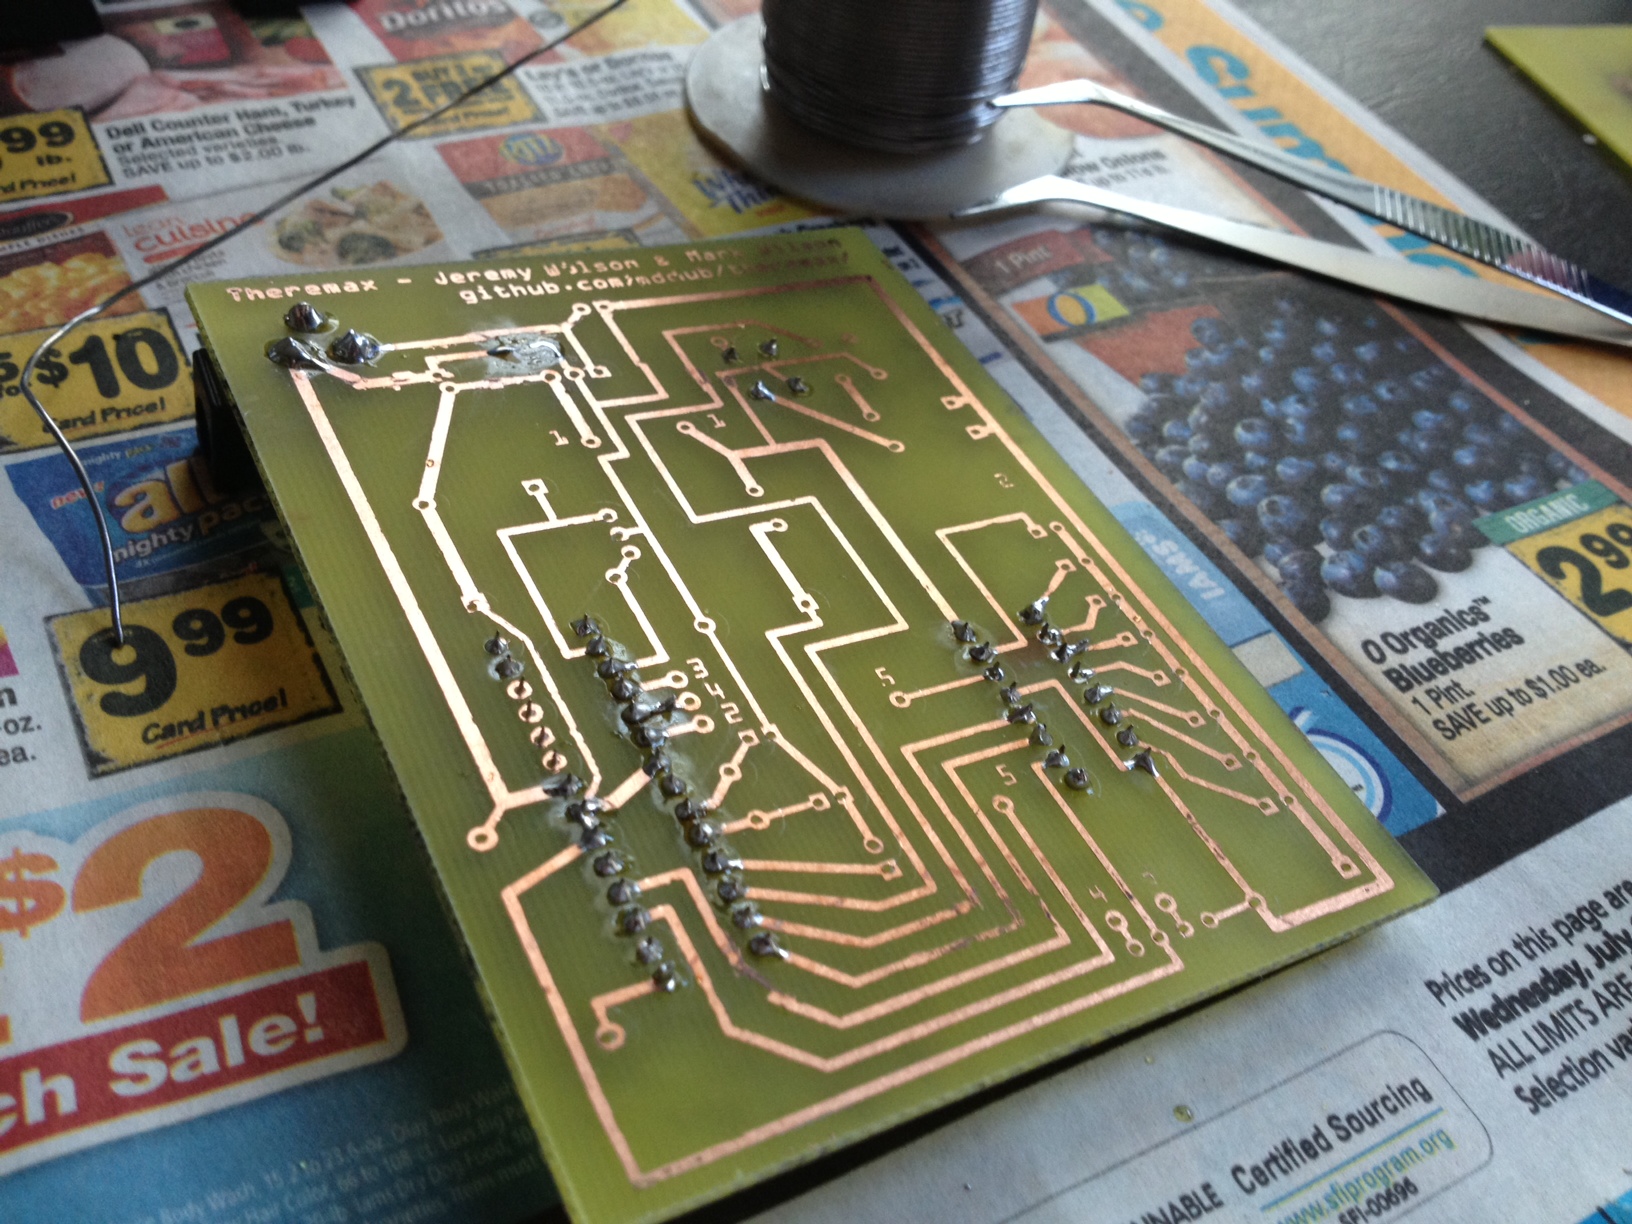
I then began soldering on the components.
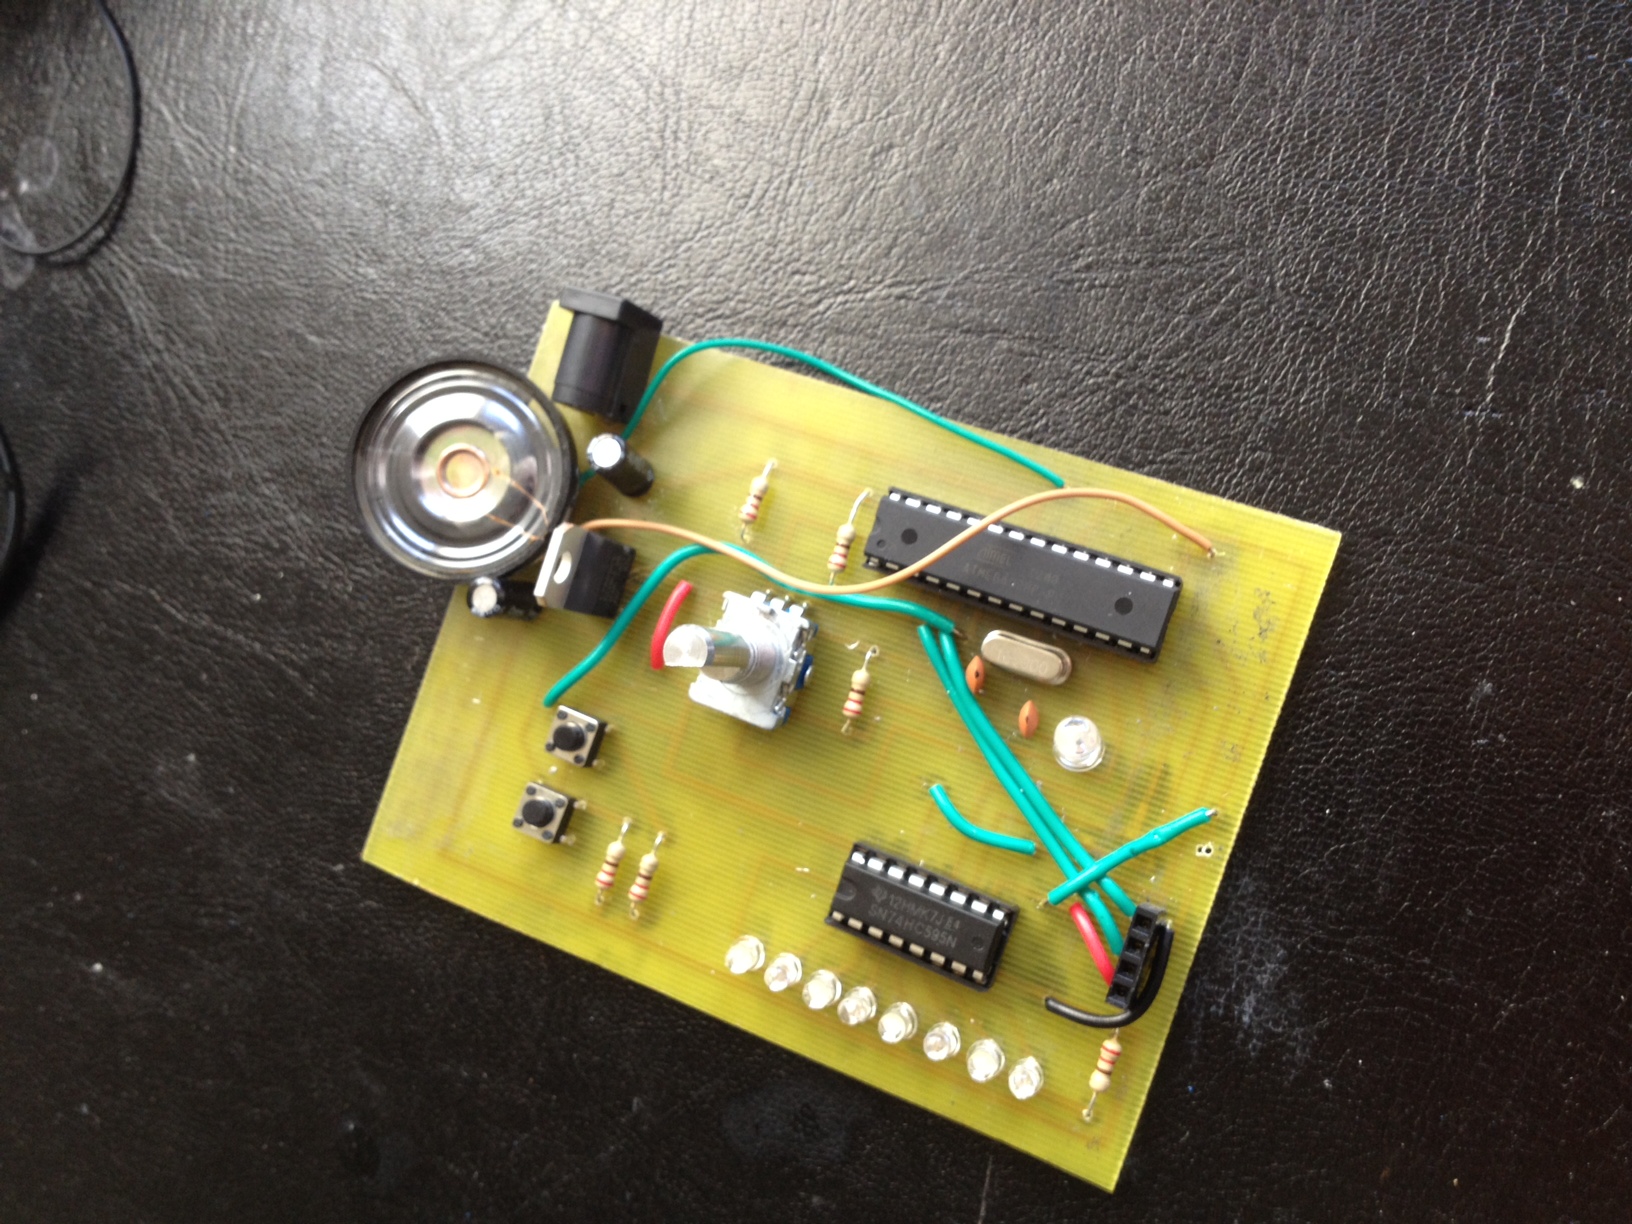
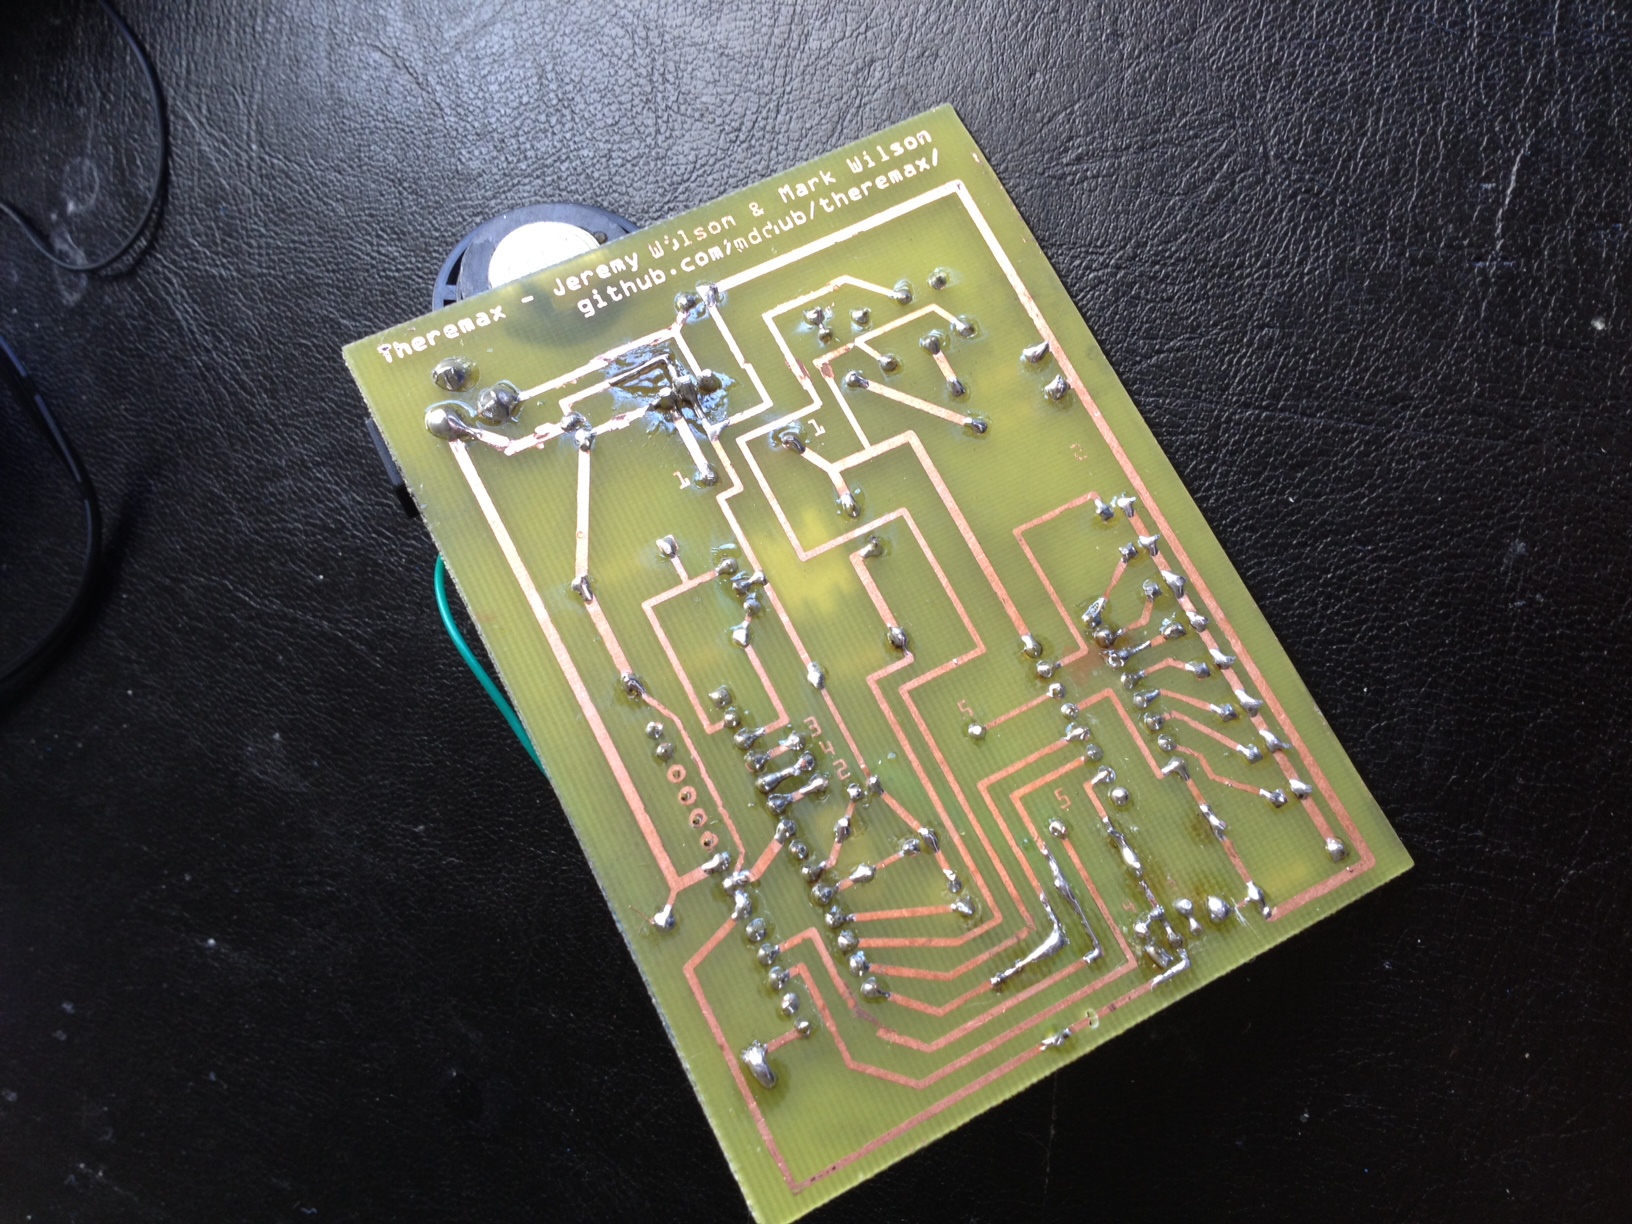
Theremax Pro complete!
I am glad that I was able to learn how to etch and make my brother an excellent gift at the same time. Etching is not as bad as I expected, and I plan to etch all of my future projects to save hours of wiring and soldering onto pre-perforated boards.
